Butter chicken

Salam to all,
By far, this is my favorite indian dish… The creamy orange sauce on the pure white basmati just does it for me, I don’t care if it has chicken in it or not.. I can eat that all day! Basically because it’s the only dish I’ve eaten at Indian restaurants that isn’t spicy at all..
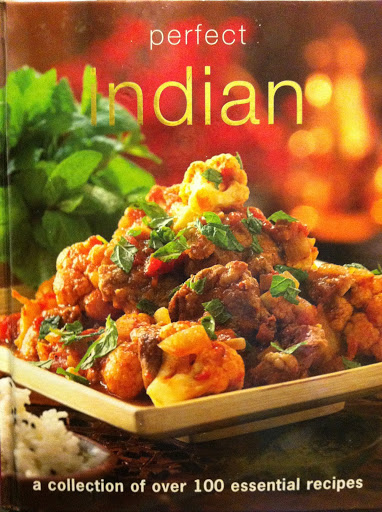
Here is the book:
And here is the recipe straight from the book:
And here is my tweaked version:
Ingredients:
1 onion, chopped
1.5 tbsp garlic and Ginger paste. (u can buy at any Asian grocery, or make your own here)
14 oz can diced tomatoes (I drained them)
1/4 tsp cayenne pepper
Pinch of sugar
2 tbsp canola oil
1/2 cup water
1 tbsp tomato paste
3 tbsp butter, cut into pieces then split in 2 portions
1 tsp garam masala
1 tsp ground cumin
1 tsp ground corriander
2 large chicken breasts, skinless boneless (cooked tandoori style)
6 tbsp heavy cream
Salt and pepper to taste.. (I used about 1.5 tsp salt all together)
Cilantro to garnish.
I skipped the cashew nuts part, and it was still good.
Directions:

I followed the directions exactly as the book said, except that i made the complete sauce first, at end I put the finished orange sauce in the blender to make it smoother, then I added the chicken pieces..
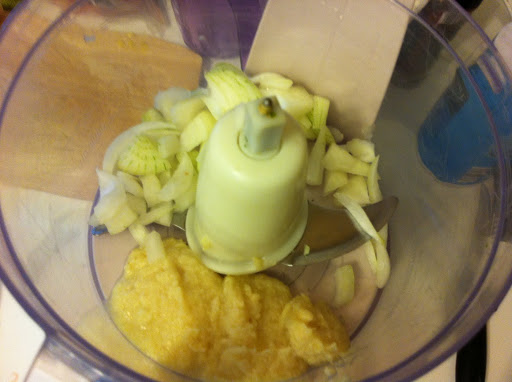
place the chopped onion and garlic/ginger paste in food processor, mix till forms a paste.


add in the diced tomatoes and blend again


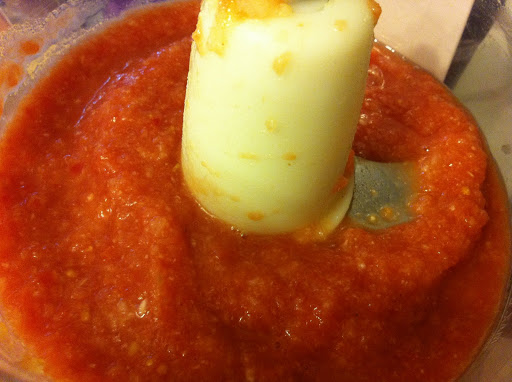
make sure to puree as much as you can


Heat up 2 tbsp of canola oil in a pan..


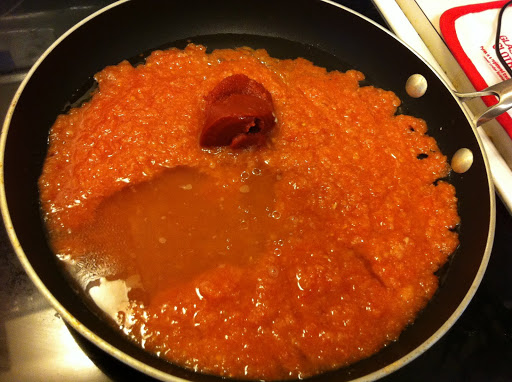
add the tomato puree and 1 tbsp tomato paste,
with 1/2 cup water and stir


when boils, turn on low heat and let simmer for 5 minutes.

get 1 tsp each of garam masala, ground cumin, corriander..

add the spices to the sauce


🙂


get your heavy cream ready


beat it manually for 30 seconds


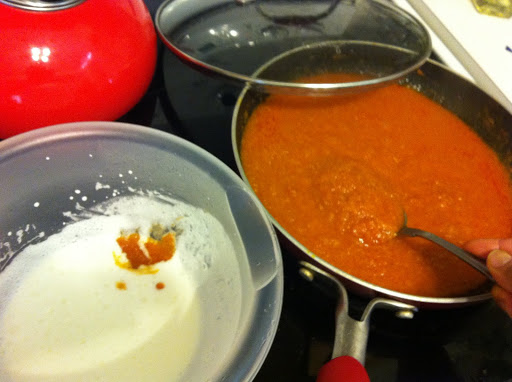
add few spoons of tomato sauce to cream, wisk together


the wisked cream with few spoons of the tomato sauce
add the cream to the pan, stir well
add 1.5 tbsp of the chopped butter.

before blending


after blending


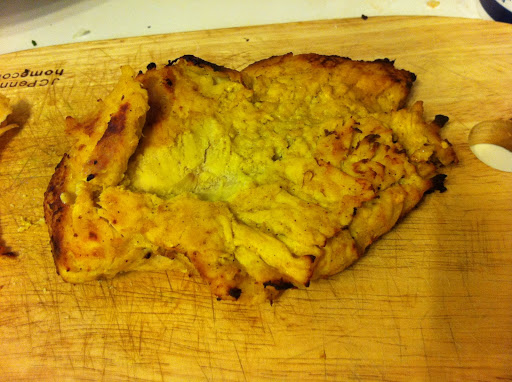
i took 2 tandoori chicken breasts i already prepared..
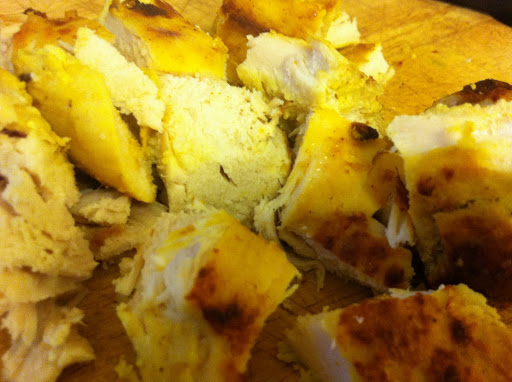
chop into pieces
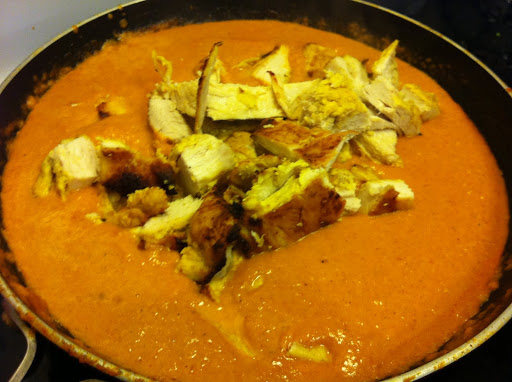
add chicken to sauce and stir til chicken is all heated through


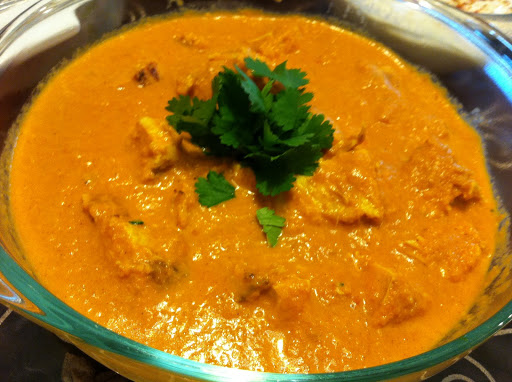
Place in serving dish, garnish with cilantro,
 and serve hot


And here is the final product!
recipe picture from the book
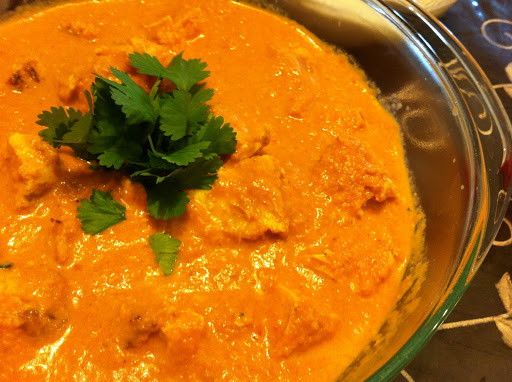
my final product
Let me know if you do try it, how you like it!
Sa7teen w 3afya 🙂


Guest Post: Making Russian Pelmeni…

Salam to all, 

Today our guest post comes from my amazing best friend.. She is from Turkmenistan and knows many Russian recipes. I was lucky enough to try these when her dear mom was here visiting, talk about AUTHENTIC! These are amazingly delicious and super simple to make, I encourage everyone to try it!!


I’ll leave you with her post:
                                                  
Here we go… Bismilahi Rahman Rahim! This recipe will be very different from EmMalik’s dishes. First of all, it is a popular Russian dish called Pelmeni. Russian food is very different from the middle eastern cooking primarily because it does not require all those exotic spices. Russian dishes are easy to cook and do not demand much skill or special ingredients. Salt, pepper, fresh dill will do the job 🙂 For some (my husband included) it’s a little bland. However, this dish is an exeption and is very popular. So let’s get to business:
There are 4 steps to making pelmeni: 1) Making the dough, 2) Making the filling and 3) Assembling the pelmeni. 4) Cooking/boiling pelmeni
Step 1: Dough
Dough ingredients: 2 eggs, 1 teaspoon of salt, 1.5 cups of warm water, 4 cupIf you have a bread maker, this step should be simple and fast. I dont, therefore sift the flour in
a bowl and make a dimple in the middle. Crack eggs and add salt, then gradually add water and knead the dough vigorously in a bowl.
When the dough gets sticky, sift some flour on the clean surface: transfer the dough and knead some more till it becomes soft, elastic and not sticky. Then divine into 2 pieces, put in a bowl and cover with a clean, dry kitchen towel
  
Step 2) Filling
1 lb ground beef, 1 medium size inion finely chopped, 2 small cloves of minced garlic, salt, pepper to taste. You can add any other spices if you wish. Mix everything togeth
Step 3: Assembling pelmeni – the fun part.
Take one piece of the dough and roll it into a big circle (about 3mm thick)
Take a round cookie cutter or medium size glass and cut circles until all dough is gone
 
Take each circle, put one full teaspoon of filling, pinch the edges and then fold two ends together. Stack each finsihed pelmen’ (that’s singular for pelmeni) on a slightly floured tray:
  
While you are finishing up making pelmeni, fill a pot with water (about half full). Let it boil. Add 1 – 2 cubes of chicken broth. When the water boils, add enough pelmeni. They are ready when they are floating on the top for 5 minutes.
Take out pelmeni using a skimmer. Some prefer broth in their pelmeni, others eat just the pelmeni served with sour cream and fresh dill.


I think those little pelmeni are the cutest thing in the world! Thanks so much for the efforts and yumminess you’ve delivered to us today! 🙂

GUEST POST: Carmelized Onion and Spinach Pizza

Salam to all, 


I’ve always admired the brain behind  The Muslim wife’s Kitchen (and the food of course) and had the honor of her guest posting for us today! Please check out her blog if you haven’t already!! She is amazing beyond words.. 


I’ll leave you with her post now……..


Bismillahir Rahmanir Raheem

When my dear sister Em Malik asked me to guest post for her, I started to think what I should post. What kind of recipe would best reflect The Muslim Wife’s Kitchen to this new audience? The answer was almost immediate: pizza. It’s no secret my family and I love pizza and I’m open to trying just about any type, heck even a desert pizza!

This pizza in particular was borne out of a desperate (ie, lazy) attempt to use whatever I had on hand to make dinner. You know how it is those last couple days before you go grocery shopping? Half a garlic clove here, half a chicken breast there. Well that’s basically how this all came together, and I couldn’t be more pleased alhamdulillah!

One of the most obviously different things about this pizza is its lack of a tomato-based sauce. If you think this is going to be just too different for your family, then I’d recommend adding some sliced tomatoes on top. I only used one giant white onion because I’m not a huge fan of a strong onion flavor, but if you are then you’ll want to double the amount. Enjoy!

Caramelized Onion and Spinach Pizza

Ingredients
One recipe of home made pizza dough (use half this dough for a thin crust; I use 2/3 and save the last 1/3 for bread sticks for later in the week) 
1 large onion (double for stronger onion taste)
2 cloves garlic, minced
half a box of frozen chopped spinach, defrosted
1/4 – 1/2 cup shredded mozzarella
4 – 5 tablespoons of cream cheese, softened
1/4 teaspoon garlic powder
1 teaspoon Italian seasoning
salt and pepper to taste

Directions
1. Thinly slice onion and saute over medium low heat. Keep sauteing until the onions take on a light brown color. This can take anywhere from  10 – 20 minutes depending on how many onions  you used. Keep the heat low and give the onions a stir every now and then to make sure nothing is sticking or burning. This may seem like a long step but its how to get the best caramelized color and flavor on the onions.

2. While the onions are caramelizing, start sauteing the spinach in a separate pan on medium heat. Add minced garlic and salt and pepper to taste. Saute until spinach is wilted and warmed through.

3. In a separate bowl, mix softened cream cheese with garlic powder, Italian seasoning and a pinch of salt. Spread this mixture on the base of your pizza. Top with caramelized onions, spinach and cheese. Bake until cheese is bubbly.


Jazaky Allah kheiran for making us drool.. and for giving us a recipe with great pics that i can almost smell the pizza fresh from the oven right now! Stay amazing as always.. Mashallah.

How to: Prepare live crabs

Salam to all,

The thought of “fresh live crabs” might sound delightful if you’re a seafood lover like me, until you buy a bunch and reach to the next thought ; “how the heck to I kill/clean/cook them?? ” ..

Well, it turns out its not that hard.. My mom showed me how and I’d like to pass it on to you guys.. I f you have the heart…

BE VERY CAREFUL WHEN THEY ARE ALIVE…  one can come up and try to snatch your knife or finger or whatever touches it. Dont worry they don’t walk around though. They do stay in place and move their arms around, depending how alive they are. Some would be already dead by the time you get home.

Ok lets get started, shall we?
 
1) place them in a large bowl..

2) with a small sharp knife, the fastest way to kill it is to stab it in the heart, as shown (sorry if this sounds like a horror movie, I can’t think of another way to explain it)
 3) It will immediately die and you will be able to carry it. (Thanks to Nur for hand modeling for me lol)
4) Here comes the real job.. .Start by pulling off the moving thingy part.. that covers the lungs i think.. (i have no clue what the name is) you can see it sticking up in picture #2 above..
There, now its off..
5) next step, is to pull off the hard shell.. the easiest way to do it is to hold the crab from the side, grab all the legs tightly in one hand, and pull on the shell with the other hand, til they come apart..
The younger the crabs, the softer the shell, the quicker the pull..
Try to pull gently so the legs dont break off, it will make it a bit harder to pull off.
 Once all Shells are off, throw them away..(unless you can figure out something to do with them?).. the next step is to clean off the lungs, and the gooey inside parts. (shown in picture above as orange and yellow blobs.. my mom claims the orange stuff is what gives crabs its flavor.. but i just couldnt leave it on there lol)

the lungs are dark grey/brown and you can easily pull them off by hand.

You can see the lungs here on the cutting board.. take off the orange stuff as well, if you want..
And there you go! wash with water and lemon juice.. and break in half (optional) or keep as whole..
Congratulations, you just completed course KILLCRAB 101..
Now to cooking it…
Many people have different ways to cook it.. this is by far the easiest and best way known (to me) and here it goes:
ingredients:
Cleaned crabs (as many as you want)
cloves of garlic, minced (how much depends on your taste , and the number of crabs you have)
a bunch of cilantro, chopped
salt
black pepper
Directions:
1) In some olive oil, saute garlic til browned.

 2) Add crabs

 3) once they turn orange, add about 1 cup of water, or just enough to cover them halfway.


 Let cook for 10-15 minutes, then add cilantro, dash of salt and pepper to taste…

Leave for another 5 minutes for flavors to blend in.. and you’re done!

Make sure you cancel any plans you had after dinner, because eating this stuff is time consuming.. But its sooo worth it!
Watch out for the shells and bones, and don’t waste no meat!
Let me know how it goes, but preferably just send me a plate 😀

Seafood feast :)

Salam to all, 
I will be sharing here pictures from our seafood “feast” last friday, recipes and how to’s will follow shortly. 

 we had 4 large fish ( i’m not good with names) and 4 smaller ones..

 also had about 20 small crabs, (they were alive when we bought them)
For recipe click here.

 Stuffed clams store bought from aldi ( surprising delicious for $2.99)

Mussels in garlic and tomato sauce (also bought frozen from aldi but i helped make the sauce lol )

I “tried” to grill them outside on the grill..wrapped in foil..  but i kinda burnt them instead.. couldnt figure out the right temperature for it, but now i know better..

this is the poor fish, burnt and ready to be eaten…

i will update with recipes as soon as i can inshallah!